by David J. Watkins
WatWare Photography 101
This page is where I share my photography tips on what helped me the most with my photography. Below are very basic concepts for taking good photographs. Of course in photography there are always execptions to the rules, but you should start by mastering the basics. These are technical basics and do NOT include tips on the art of composition. That is for a whole other discussion.
Focus:
Probably the most important thing to think about when shooting.
I review each and every one of my photos at 100% (1:1 in Lightroom - I use Adobe Lightroom to process my photos).
I only keep the photos that are tack sharp (at least where they should be). If you shoot living things
like birds for example, at the least, the eye and head should be
tack sharp and not a bit soft or out of focus. The background of an animal photo, depending
on the shot, you probably want as blurred as possible especially if there are alot of distracting
features. So blurring the background is an example of where out of focus is ok or even expected.
Most wide angle landscape photos should be tack sharp throughout. Unless you are going for
some specific effect, you will want your subject in perfect focus.
Should you use Auto Focus or Manual Focus? Use whatever works for you!
I use a mix of both! When I shoot birds, I use a single point auto focus, since birds rarely stay still for more than a
couple of seconds. The Canon 5D Mark II has nine focus points that can be individually set.
I almost always use only one point and move it around to wherever I anticipate the birds eye will end up.
For landscapes I manually focus. Though many times I will use auto focus to get the focus close to what I want, then I will manually adjust
from there. I will also use the confirmation beep/light to verify that the camera thinks the shot is in focus. Again, use whatever
works for you to get that tack sharp focus! Read your camera manual to learn how to move your single focus point around, this will help the
camera auto focus on your subject and not on a distracting background.

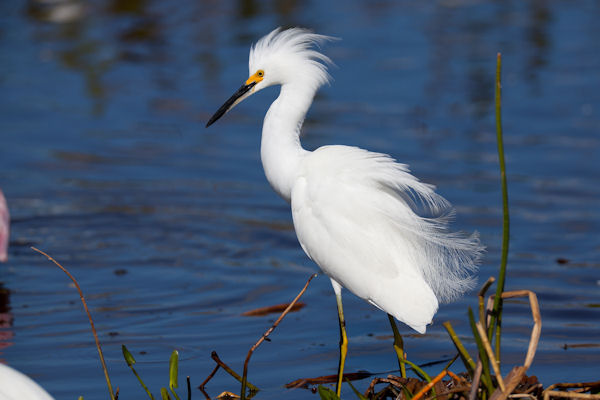
Look at the photo to the left, is it in focus where it would be expected to be?
Study the head, eye and beak. At this resolution 600 x 400 it is extremely difficult if not impossible to tell.
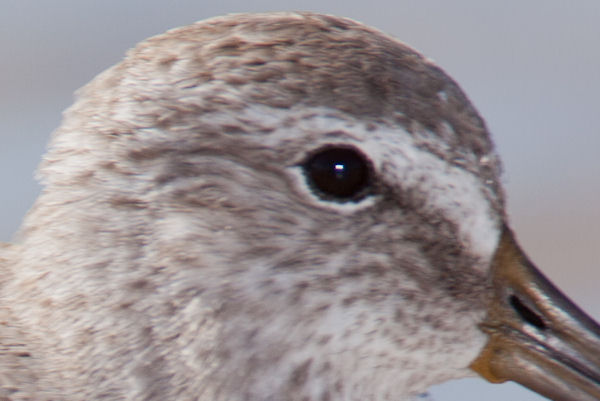
Here is why you need to examine your photos at 100%. Here you can clearly see that it is out of focus!
You may not think that this is a big deal because it looks ok at 600 x 400, but if you want to sell your photos through a
stock agency, they will never get accepted like this! All photo editing software will allow you to perform a 1:1 or 100%
zoom. You need to inspect your photos zoomed in at this level. If you ever submit your photos for critique they will
most likely request a 100% crop section of your photo similar to this example.
Can you fix this in Photoshop? NO! It is out of focus, nothing will bring it back! The Photoshop sharpening tool will only
destroy the look of the photo further! Stock agencies can tell when a photo has been "oversharpened"!

To the left is another shot of a Lesser Yellowlegs at 600 x 400 resolution. You can barely tell a difference between the sharpness on this photo and the first photo above.
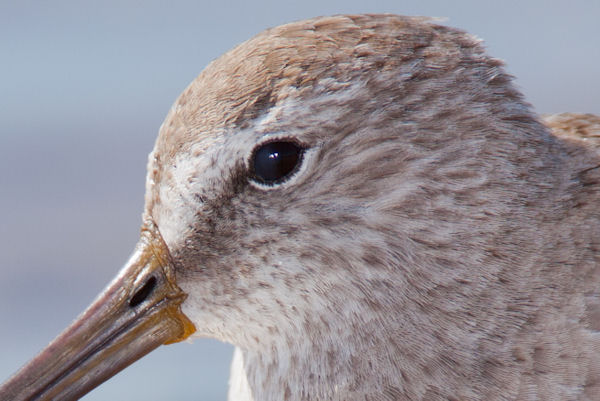
At 100% crop you can see that the eye is in focus, the detail in the beak is in focus. This photo might get accepted by a stock agency, though they would probably want the legs in focus as well. That would require a greater depth of field. The aperature was at f7.1. To get the legs in focus, I would have had to set the aperture to f16 or probably even smaller, but to get the correct exposure I would have had to decrease the shutter speed. Decreasing the shutter speed on a moving bird means it's more likely to blur and the whole shot would be out of focus! You can bump up the ISO (gain on the sensor) to allow faster shutter speeds at smaller apertures(higher numbers) but that also comes with consequences like noise and artifacts.
Exposure:
Probably the second most important thing to think about when shooting.
Make sure your subject is properly exposed with the correct amount of light on the subject.
An underexposed photo or subject will appear too dark. The subject will not stand out from the background.
An overexposed photo or subject will appear too light or possibly faded. All digital cameras will have a means of measuring
or metering for the correct amount of light. If you shoot full automode, the camera will adjust the shutter speed, aperture,
and ISO setting to achieve the correct exposure, though that may cause other issues like your subject to be out of focus if the camera
chooses too slow a shutter speed. You can take some control by shooting in Aperture Priority Mode or
Shutter Priority Mode, but that still may introduce noise if the ISO setting becomes too high. Or you can take full control and
shoot in manual mode, like I do. In manual mode you must choose the ISO setting, shutter speed, and aperture. All digital
cameras will indicate via their light metering system when everything is set for the correct exposure. Many cameras will allow you to
set the metering system to meter the entire frame (evaluative metering) or meter just in the center of the frame
(spot metering) so the metering priority is on the subject. Many digital cameras will have a few other metering options as well.
Elvaluative metering is the default metering mode on most cameras. That is it for the most part it evaluates the light in the
entire image.
Another common mistake is to "blow out the highlights". This means that for the most part, the photo is
correctly exposed but the detail in a section of the photo light in color, has been lost. Losing the detail means that everything
has faded out to pure white.
The photo to the left is underexposed by about 1 1/3 stops. This is actually a good example of a bad photograph! It's out of focus for one, and has a few other issues. We'll see this one again later for some other examples.
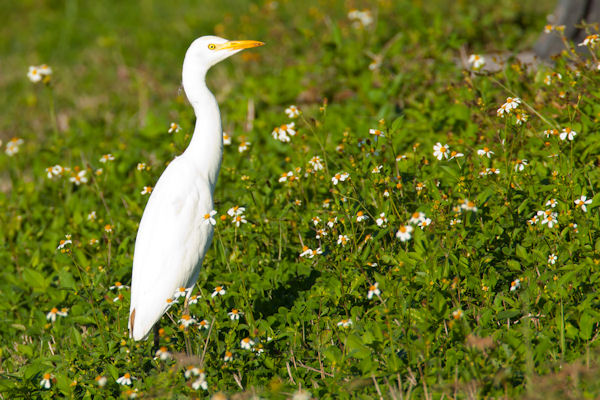
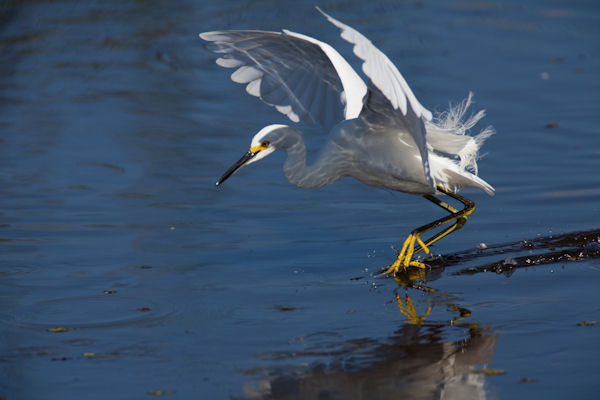
In the photo to the right, the Cattle Egret is overexposed by at least a full stop. But, notice how the surrounding
vegitation seems to be correctly
exposed? What is going on?
When shooting a light subject on a dark background is easy to overexpose the subject.
Here is where full manual control will get you the correct exposure. If I had underexposed this shot by 1 stop, the bird
(the subject) would be correctly exposed while the vegitation would be slightly underexposed. Underexposing the vegitation is
ok since the bird is the main focal point or subject of the photo. Shooting in full auto mode will render a result like this where
the bird is overexposed. In this case Aperture Priority Mode or Shutter Priority Mode would still yeild the same over exposed result.
This is also an example of blown highlights because the white is overexposed and there is no detail in the white.
The photo to the left is properly exposed. For this shot, I used evaluative metering mode and I underexposed by 1 full stop, knowing that the white of the bird was going to be too bright if I shot by what the camera's meter suggested. I could have also used spot metering mode, but metered the bird at 2 stops overexposed, and the shot would have come out close to this. Spot metering mode is for another discussion.
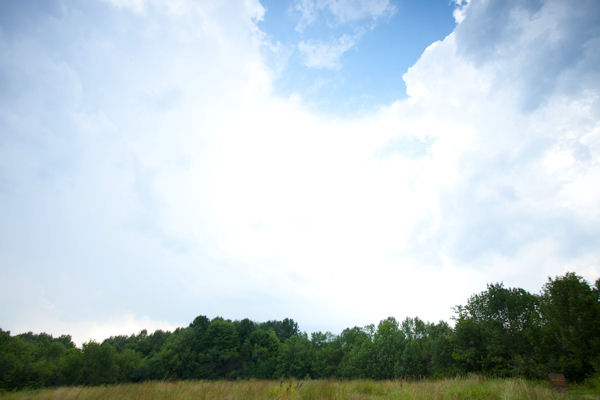
This is a common occurrence that I see in photos. The "Blown Sky"! The blown sky tends to occur when shooting in bright
sunlight on a day with some clouds. It is even worse on overcast days. Notice how it also destroys detail in the adjacent
leaves on the trees! The camera adjusts to expose the entire scene for a mid-tone gray, so typically the foreground will be too dark and
the sky will be blown.
How do you correct this? You can take two photographs
at different exposures, one exposed correctly for the sky, the other exposed correctly for the foreground and blend them together with software.
You could also take several photos and create an HDR (High Dynamic Range) photo using HDR software. Or you can use a Graduated
Neutral Density Filter. An ND Grad filter is a piece of glass or resin that sits in front of the lens.
It is darkest at the top fading to clear at the center. You can google ND Grad filter for more information.
Noise/Artifacts:
Noise? You can't hear anything in my photos? We're not talking audio noise here. Noise in a photograph is data that was
not part of the original scene but was erroneously generated electronically by either the camera or by post processing. Noise typically shows up
in the darker areas of photographs. A common place for noise is in shadows or a dark blue sky. Camera generated noise is when the
sensor cannot determine actual detail so it effectively makes up data in the form of small blotches. Higher ISO settings on the camera
will tend to generate noise. Underexposing an image will tend to generate noise as well. Post processing tasks such as sharpening
and boosting the brightness can generate noise.
How do you avoid noise? Try to shoot at low ISO settings on your camera like 100 or 200. If you must shoot at higher ISO, make sure
your photos are exposed perfectly, that will tend to limit the noise. If you do end up with noise in your photo, as you most likely will at some point, there
are several software programs like Noise Ninja and Neat Image that will run standalone or as a Plugin to Photoshop or Paintshop Pro. Native noise
reduction in Photoshop or Paintshop Pro does not work quite as well as the third party plug-ins. I use Noise Ninja.
Generally noise applies to digital cameras only, film will exhibit a similar effect with higer ISO films. Film noise is often called
grain.
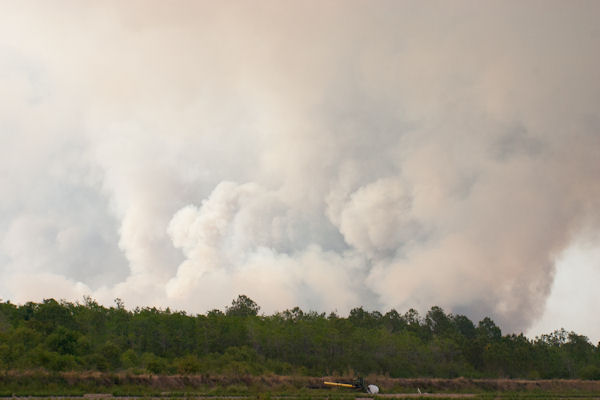
The photo to the left contains an unacceptable amount of noise. This was caused first by underexposing the image as it was taken, then the image was brightened and sharpened in post processing. You may not be able to pick out the noise at this resolution.
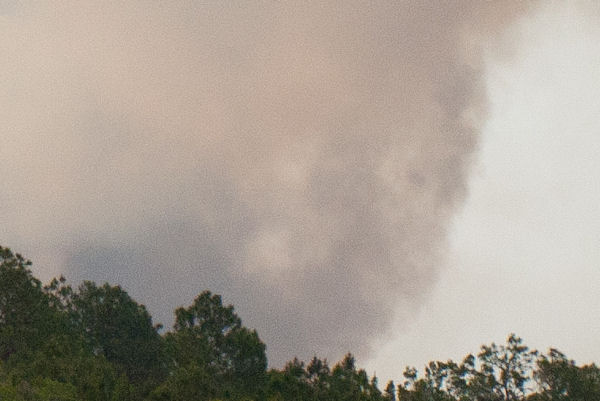
Another reason to view your photos at 100%. The noise is very visible at 100%! Notice that the image appears blotchy or pixelated? This is completely unacceptable for stock images! Photos like this will get you warnings and eventually banned from submitting images if you continue to submit this type of quality.
Lens Flare:
Shoot toward the sun without a lens hood or shoot with a rectangle filter with the sun behind you and you can get
lens flare. Lens flare is bright light reflecting off the surfaces within the lens. Sometimes lens flare is
purposely created for an artistic effect, but generally it is an undesireable problem.
How do you avoid it? Use a lens hood when shooting in the direction of the sun, even if the sun is not in the frame.
If you use rectangular filters such as Neutral Density or Graduated Neutral Density, place some kind of shade or even
your hand over top of the filter. Just be careful not to extend the shade out to where it ends up in the frame like on
a wide angle lens.
If it ends up in your photo, can you get rid of it with Photoshop? Not very easily! There is no "lens flare"
removal tool.

Shooting toward the sun with no lens hood or shade caused the lensflare in the photo to the left. The reflections have been circled in red to help point them out.
Chromatic Aberration:
Also known as purple, red, blue, or yellow fringing. It's that colored sort of halo around a dark image against a
white or very light colored background. It can also appear around a white subject against a dark background.
It's caused by the lens's inablilty to focus all the different wavelengths of light on the
same plane. All lenses will exhibit this effect at some point or another. Better quality glass like Canon L lenses
help but will not completely eliminate the problem.
How do you avoid it? Shooting at wide apertures or shooting objects against a light sky or white background will often
result in a photo with chromatic abberrations. So avoiding those situations will help but not guarantee that you won't get CA.
How do you get rid of it if you can't avoid getting it in your photo. Photoshop and Adobe Lightroom have tools for easily removing
chromatic aberration. In Lightroom it's one click and two slider adjustment and it's gone, very easy to remove!
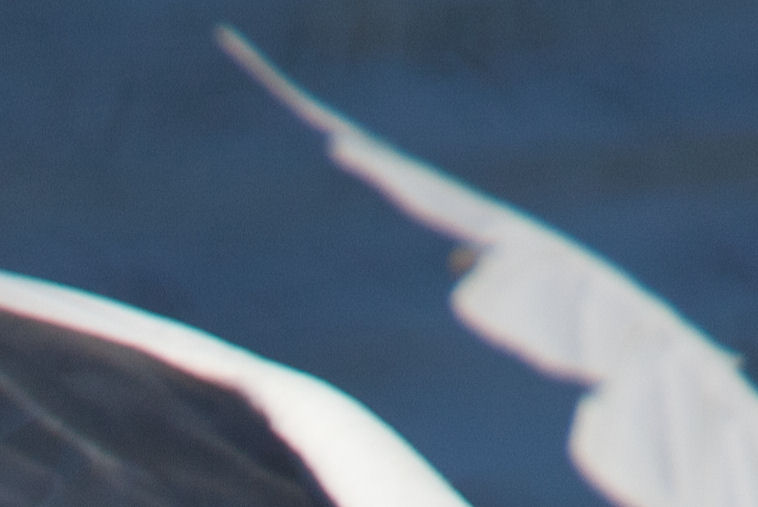
Here is a 100% crop of that Snowy Egret photo that I mentioned was a good example of a bad photo.
Notice the purple halo on the bottom edges and the cyan halo on the top edges. This is Chromatic Aberration!
Also you should recognize noise in the crop and that the wings are out of focus!
Dust Spots:
We're talking dust spots on the camera sensor, NOT on your lens. I assume if you're reading this then you are beyond getting
finger prints and smudges on your lenses or cleaning them with your shirt sleeve or tee shirt! The sensor in your camera has a
flat surface and if any dust gets inside, it
can potentially land on that surface. You won't see the dust on the sensor when you look through your viewfinder.
The dust you see when you look through your viewfinder is actually on your mirror or on the viewfinder focusing target.
That dust is just annoying and won't affect the outcome of your photos unless it makes it's way behind the mirror and on to
your sensor. If you shoot with a point and shoot camera, you should never see dust spots on your photos, if you do that means that
dust has made its way inside your camera body! That would also mean it's time to replace your camera!
How do you avoid dust on your sensor? Don't change lenses out in the open in the wind!
How do you get rid of dust spots that appear in your photos? Adobe Lightroom has a great spot removal tool. Almost
all the software packages for editing photos will have some kind of tool or procedure for removing dust spots.
Can you clean dust off your sensor? If you have fingerprints or smudges on your lens or lenses, then take your camera to a
authorized dealer to have your sensor cleaned, and skip to the next section! Most DSLRs have a mirror lockup for cleaning the
sensor. Actually your sensor is not directly exposed but there is a filter that sits on top of the sensor. The filter is
what ends up getting the dust on it. Many DSLRs have an auto-clean mode that slightly vibrates the filter when you turn on or off the
camera. Many times static will cause the dust to cling to the filter surface and the vibration will not shake it loose. If you
still have dust after activating the sensor clean feature on the camera, then you will need to use another method to get rid of it.
The first thing to try to clean off dust is to use a bulb type blower and gently puff air on to the
sensor with the sensor aimed down so dust falls out of the camera body. DO NOT EVER BLOW COMPRESSED AIR TO CLEAN OFF YOUR
SENSOR!!! You can actually scratch the glass filter that sits on top of the sensor, then you will have permanent
spots in your photos! If you're unsure, then take your camera to an authorized dealer to clean the sensor. There
are do-it-yourself kits with swabs and solutions that actually work very well, but again if you don't know what you're doing you
can easily damage your glass filter over the sensor! I use the swabs and solution by a Canadian company Visible Dust.
You will also need a lighted magnifier system to view the surface of the sensor.
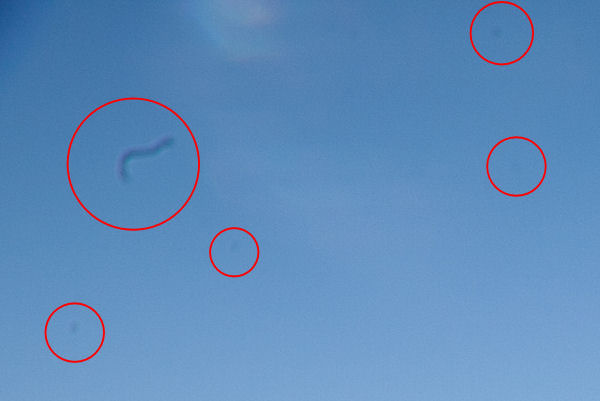
100% crop of a photo shows how dust spots on the camera sensor appear on your photographs. The spots are circled in red. This crop also shows noise and lens flare at the top. Are you starting to understand why you should review your photos at 100%?
Get It Right In The Camera:
Sure Photoshop, Lightroom, Paintshop Pro, etc. can clean up many issues with your photos, but you should strive to get it right in the camera. You want to spend the majority of your time shooting and not editing. Even with the best software tools money can buy, there are just some things that you won't be able to fix outside the camera. You will never fix bad focus after the shot, even if you have one of those new light-field array cameras, if you blur the shot with movement, you will never recover the focus. If your exposure is greater than 1 stop off you won't likely recover the photo. Lens flare is often bad enough to render a photo unfixable.