by David J. Watkins
Beginning Astrophotography - The Moon
1) Astrophotography 101 2) Wide Angle 3) The Moon 4) Large Nebula 5) DSO's 6) Planets 7) The Sun
Shooting the Moon:
The moon is by far the easiest night sky target to capture. It is large and it is extremely bright. You don't need a telescope and you can find it very easily in the sky. With a telephoto lens, you can compose the moon into landscape scenery images. With a super telephoto lens (500mm or greater) you can capture incredible surface detail of the moon. Unfortunately with wider angle lenses it appears as a very tiny disc and does not stand out in the image.
So all you really need to shoot a moon image is a camera with a zoom lens or telephoto lens and a sturdy tripod to hold the lens. To get surface detail on the moon a super telephoto lens or telescope is recommended. Since the moon is so bright and can be captured with fast shutter speeds, there is no need for a tracking mount. The moon still moves and if you have a super telephoto lens or telescope you will find yourself having to adjust your equipment to keep the moon centered in the frame. A refractor telescope is ideal for moon images. If you use a telescope to shoot the moon, you may want to consider using video and software to use the sharpest frames in the video to stack for a sharper image. If you shoot the moon at high magnification, the stability of the atmosphere comes into play. On a bad night it can look like you're viewing the moon under water, and that will not produce sharp single shot images.
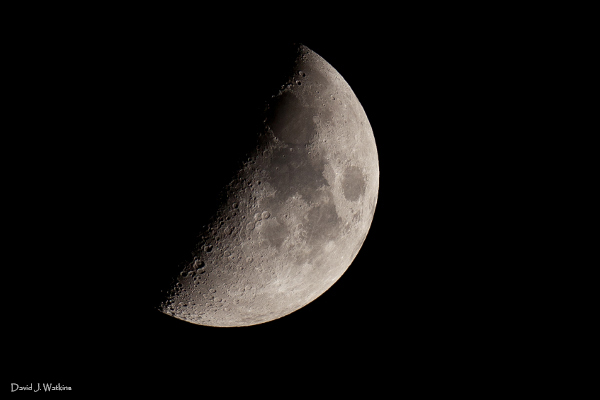
Since the moon is so bright it can be shot at ISO 100 with a fast shutter speed of 1/250 or 1/200 sec.
I shot this image at 1/200 sec at ISO 100 on a 600mm lens at f/5 on a tripod. I cropped this
image about 30% from the original image to fill the frame with the moon.
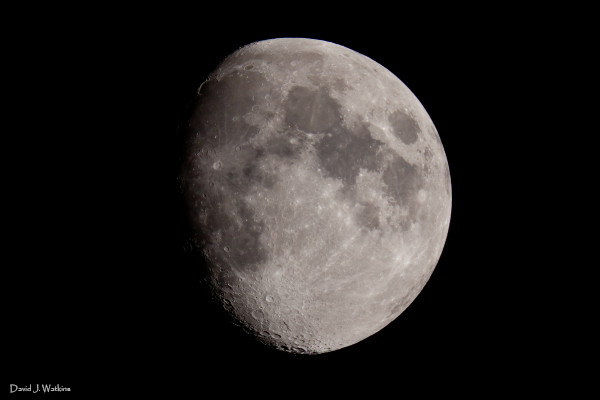
For this image I used my 600mm lens and attached both the EF2X and the EF1.4X Extenders for a focal length of 1680mm.
ISO 100, f/8, 1/200 sec. You can see that all the added glass from the extenders has softened the image
quite a bit. It is not nearly as sharp as the image above. This image is also slightly cropped,
it is 76 percent of the orignal image.
The first thing most people want to do is shoot an image of the full moon. A full moon is great to include in a landscape scenery image, but for solo moon shots, it tends to turn out a flat image. A partial moon tends to make the craters stand out creating a much more interesting image.
It is very difficult to fill the entire frame with the moon using a lens, even with a super telephoto lens. A 600mm lens has a 4 degree diagonal field of view. The moon is approximately 1/2 of a degree across. My telescope with a 2030mm focal length will fill the frame with the moon. I don't know of any currently manufactured lenses with a focal length greater than 800mm. You can use tele extenders to achieve longer focal lengths with lenses. The only downside to this is that tele extenders add more glass elements in the image path and this can "soften" or reduce the sharpness of the image. Cropping an image from a 500, 600, or 800mm lens will yield better results than stacking on telextenders. With camera sensors of 18 or 21 megapixels, images can be cropped and still have great resolution.
Super telephoto lenses can be great for capturing moon/planet conjunctions. A conjunction is when two objects appear closer than a few degrees from each other in the sky.
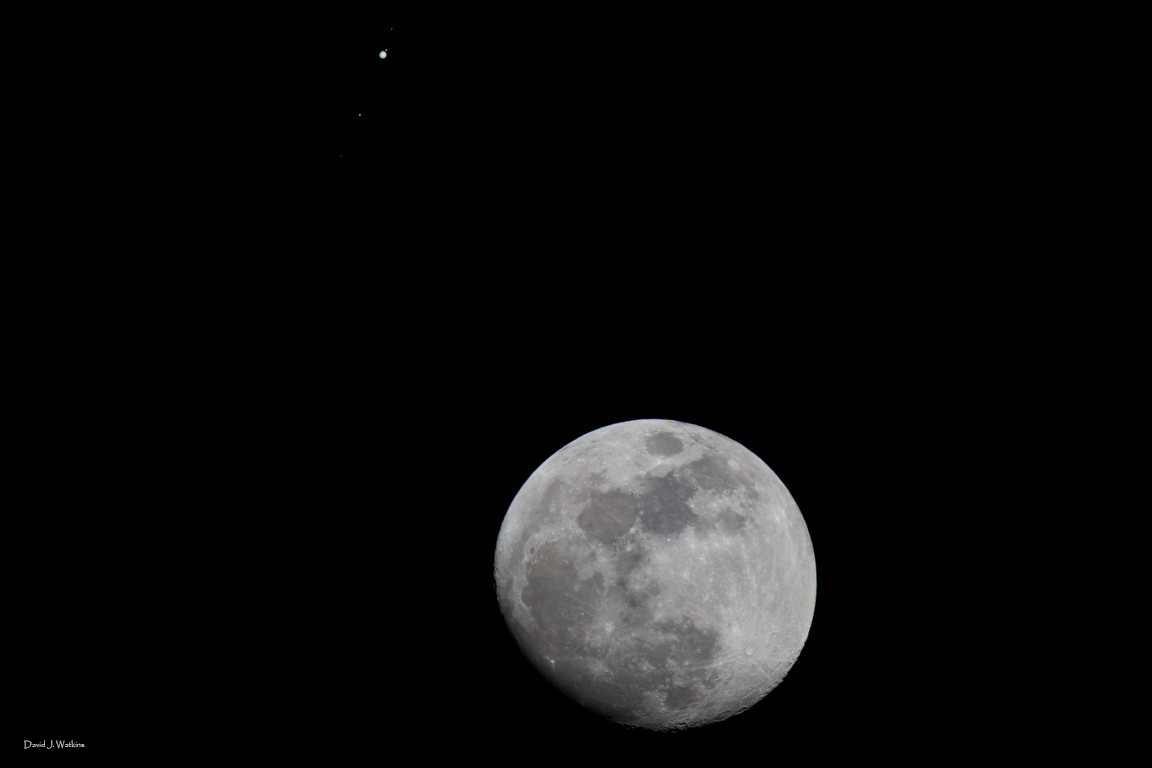
The above image was shot on Christmas Day 2012, it is the conjunction of the Moon and Jupiter. The moon is a single shot, but Jupiter and it's moons were very dim in the original image, so I took multiple images of Jupiter and its moons and stacked just that portion on to the original shot. The original shot was at ISO 100, 1200mm (600 lens with 2X extender), f/8, 1/250 sec. The multiple images of Jupiter were shot at 1/125 sec and Jupiters moons were shot at 1/5 sec. It took aligning and stacking 20 images of Jupiter and 10 images of Jupiters moons to bring out the brightness. This image was NOT cropped at all. In the Aquiring Astro Images and the Astro Image Processing section of this site I discuss how to capture and process images like this one.
Using Video to Capture Your Lunar Images:
If you have ever observed the moon thorugh a telescope or large lens, you will notice that the earths unstable atmosphere can cause all sorts of distortion effects. It can appear as if you are looking at the moon under water! Depending on how unstable the atmosphere is at the time, you may not be able to get a sharp image. Shooting video will allow you to take many short exposures that may capture very short moments when the atmosphere is actually stable. The higher the frame rate of the camera the better chance of capturing stable moments. There are many free software pacakages that will sort the sharp frames and stack the images to produce a final sharp image.
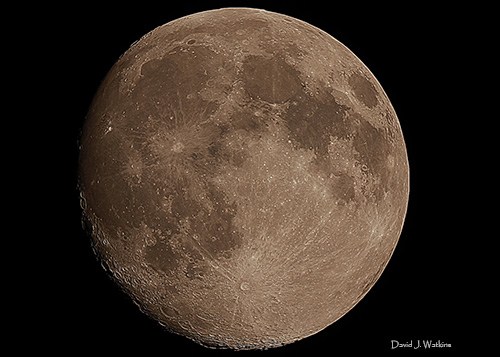
For this image I attached my Canon 5DMarkII with the Celestron T adapter (one section removed) to my Celestron EdgeHD 8 inch SCT scope. ISO 200, 1080p video at 30 frames per second. I had to remove one section of the T adapter because the moon was too large to fit in the frame of the camera. By moving the camera closer to the scope I could get a smaller image on the camera sensor. I used PIPP (Planetary Imaging PreProcessor) software to sort the sharpest frames and used AutoStakkert! to stack 30% of the sharpest frames. My total video was over 10,000 frames, about 5 minutes long. PIPP chose the 1200 sharpest frames, the Autostakkart used 30% of those. If you shoot video with a telescope like this then you should use a GEM mount for tracking.
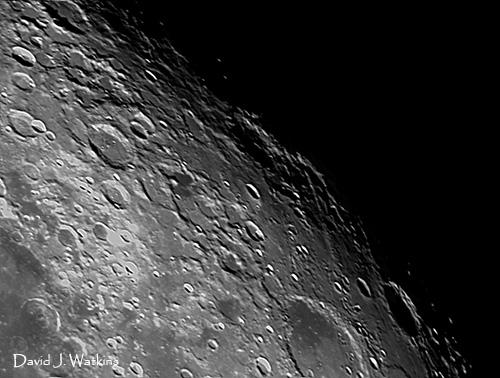
For this image I used my 1280 X 960 QHY5L-II auto guider camera and the software Firecapture. I
dropped the camera straight into the diagonal on my Celestron EdgeHD 8 inch SCT. I
captured a few hundred frames and used PIPP to sort the sharpest, then used Autostakkart
to use 30% of them. You can capture the entire moon this way then use software to
stitch together all the images for a large mosaic of the moon.
Notice the difference in the magnification of this image versus the previous image? The difference
is due to the sensor size on the camera. The Canon size is 36 by 24 millimeters vs 4.8 by 3.6 millimeters
on the QHY5L-II camera. The image appears to be magnified because the projection of the image is larger
on the smaller sensor.
This is the original video capture used to produce the image above.
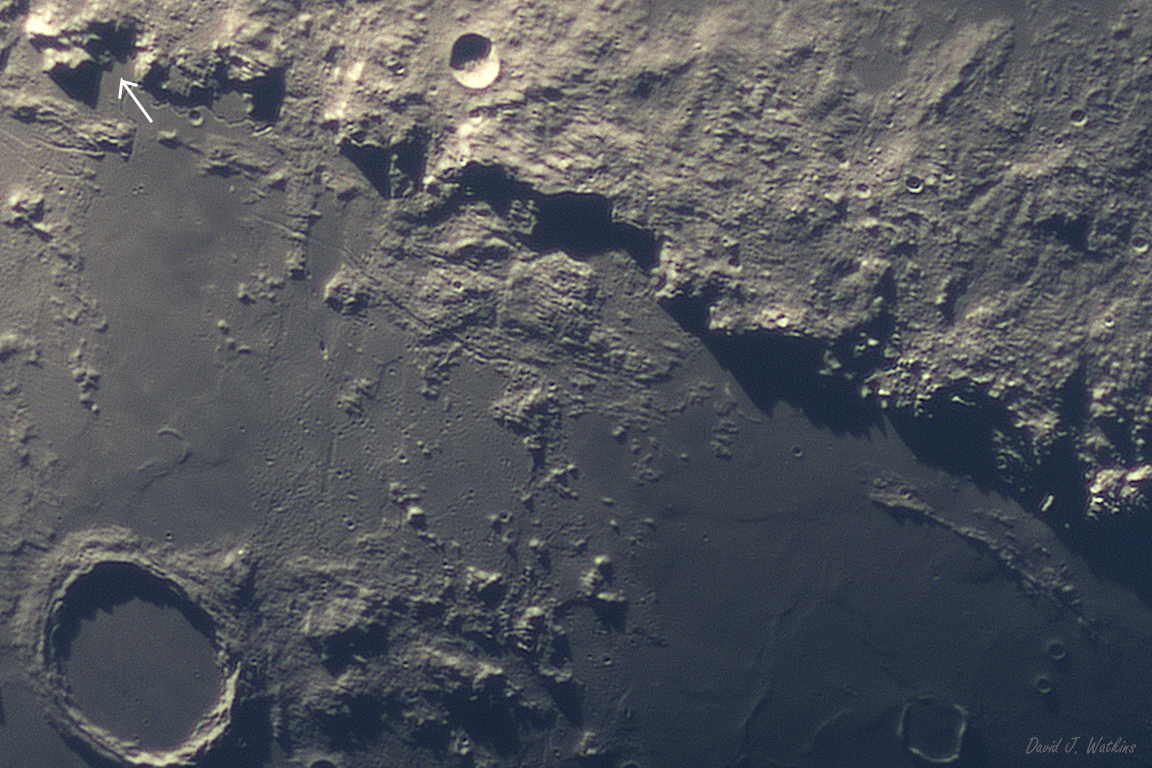
Here is another example of using video to capture the lunar surface. For this image I used my ZWO ASI178MC 6MP color camera attaching it to a 5X Televue Powermate on my Celestron EdgeHD 8 inch SCT. I used the software Firecapture to control the camera. I used the full resolution of the camera so it was capturing about 30 frames per second and I captured about 15 seconds of video. This was an evening of exceptional seeing. Using the 5X Powermate is probably pushing the telescope beyond what it was designed for, but on this night it did yield results! I used AutoStakkert to use 30% of the sharpest frames. The pixel size on the ASI178MC is 2.4 microns. I roughly figured the scale to be about 1 pixel = 1/10th of a mile. Notice that I placed an arrow on this image in the upper left corner. That arrow points to the landing site of the Apollo 15 mission! No, you won't be able to see the lunar module or the flag! Remember 1 pixel = 1/10 of a mile.
Review Of Recommended Equipment:
- Sturdy Tripod
- Telephoto lens 200mm - 400mm for shooting moon in landscape photos
- Super telephoto lens 600mm or greater reveal surface detail.
- A short to medium focal length refractor telescope to reveal surface detail.
- SCT telescope to reveal close up surface detail.
- DSLR camera.
- CCD/CMOS camera with video.
- Software to stack moon/planet conjunction images.
- Software to sort video frames and stack video frames.
- GEM Tracking mount if you plan on high magnification and video.
1) Astrophotography 101 2) Wide Angle 3) The Moon 4) Large Nebula 5) DSO's 6) Planets 7) The Sun